Gumball Machines Galore!

I just realized I’ve never posted the three versions of my gumball machine art quilt pattern. It is available for sale in my Etsy shop. The pdf quilt pattern also includes a quilt photo, supply list, detailed instructions and now you have three ways to collage it!

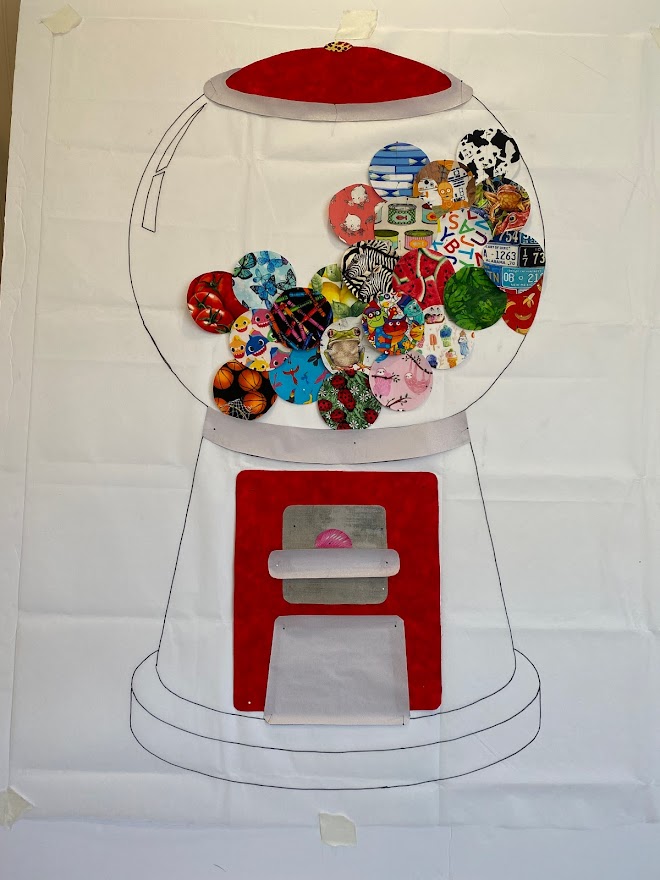
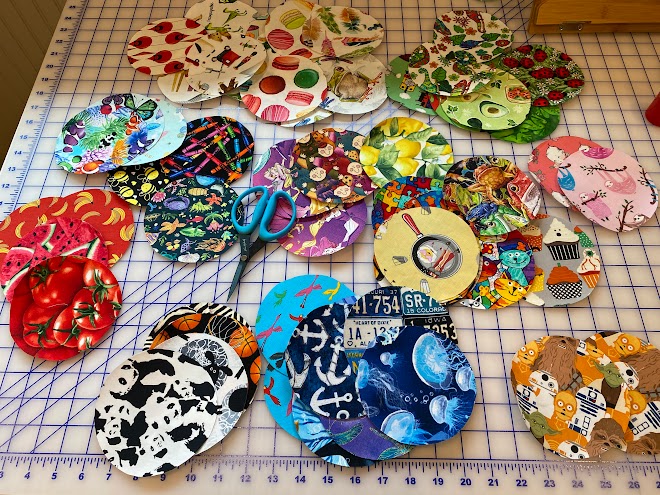
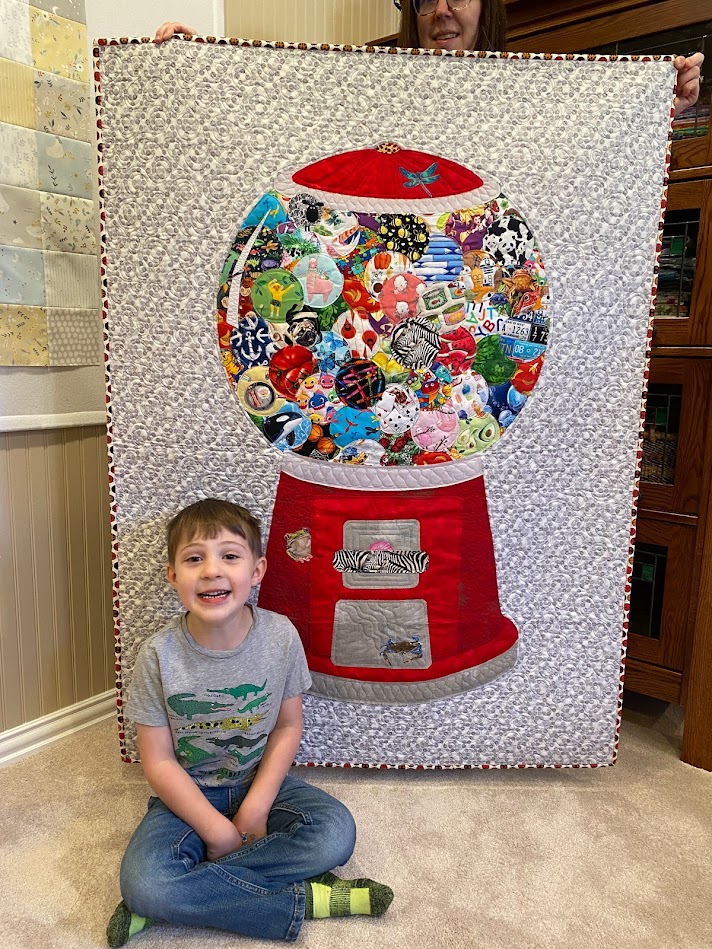
The first art quilt version is a traditional I-Spy quilt in the form of a super fun gumball machine! I call it “I-Spy Gumballs.” It has approximately 50 gumballs and is a great opportunity for little ones to learn language. It would be a great gift for the preschool/kindergarten teacher on your Christmas list.

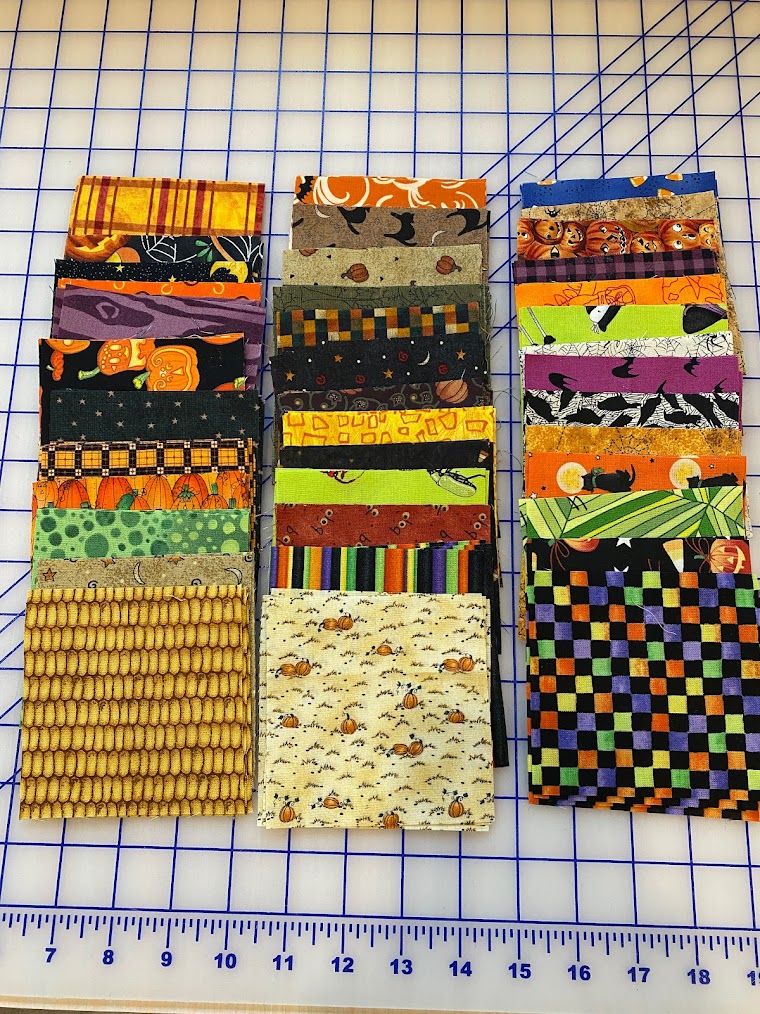
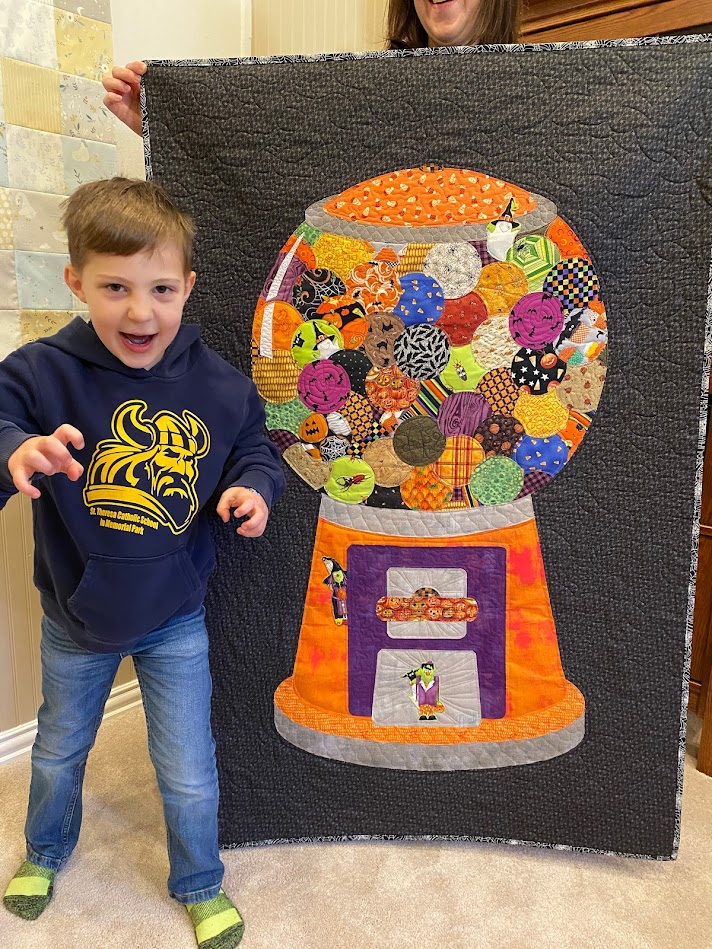
The second gumball machine quilt used a fraction of my Halloween novelty fabric. Over the years, my eyeballs tended to gravitate toward Halloween fabric. I never knew exactly what to make with it. I call this art quilt “I Spy Spooky.” I love to hang seasonable quilts and was happy to add a whimsical Halloween quilt in my entryway!

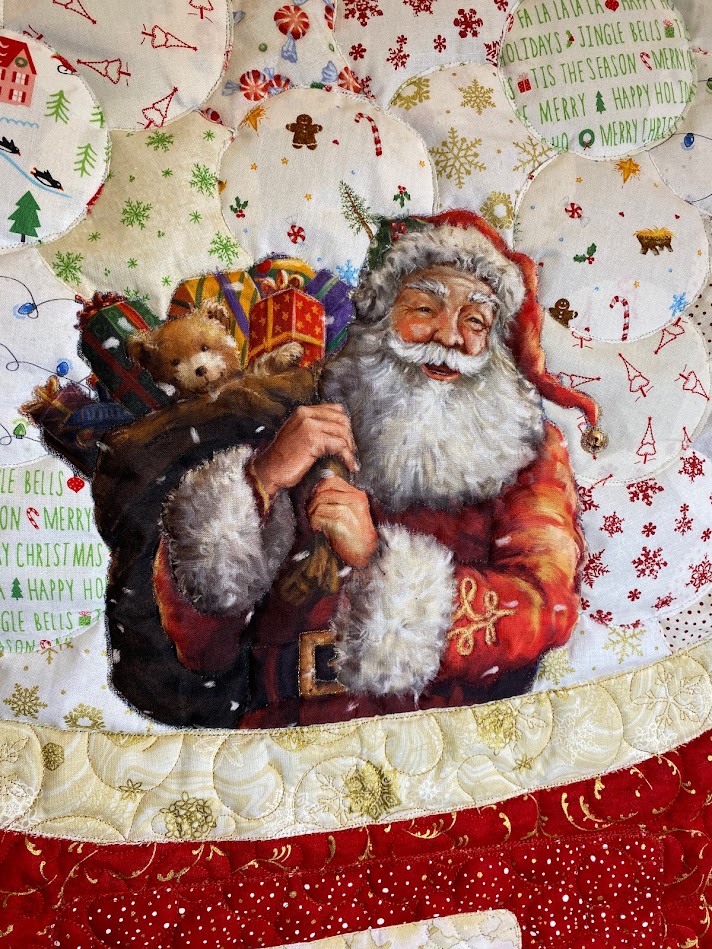
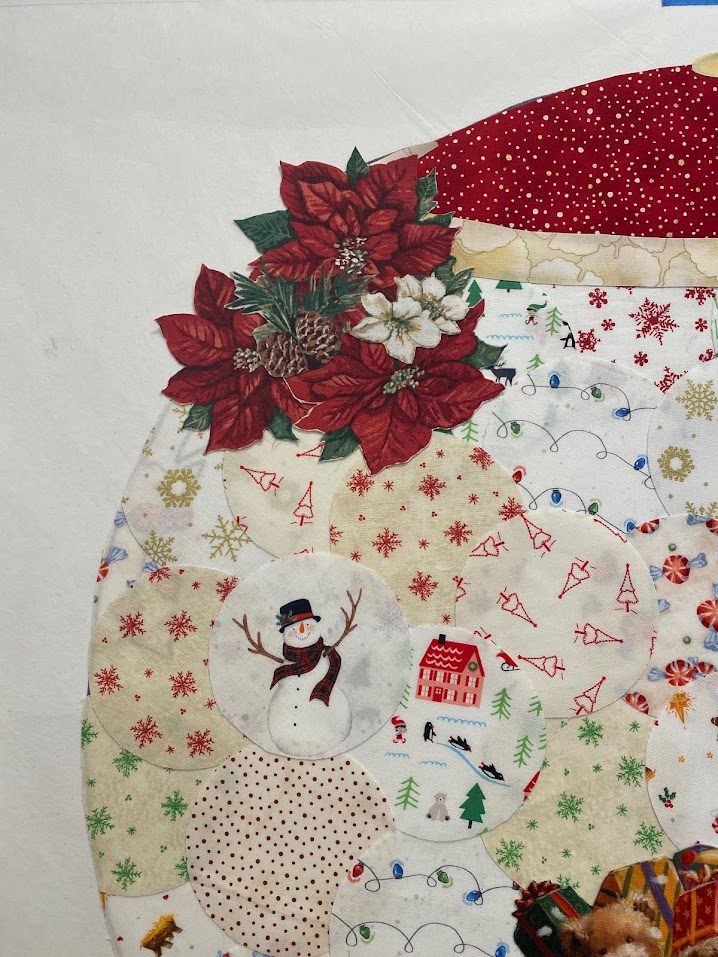
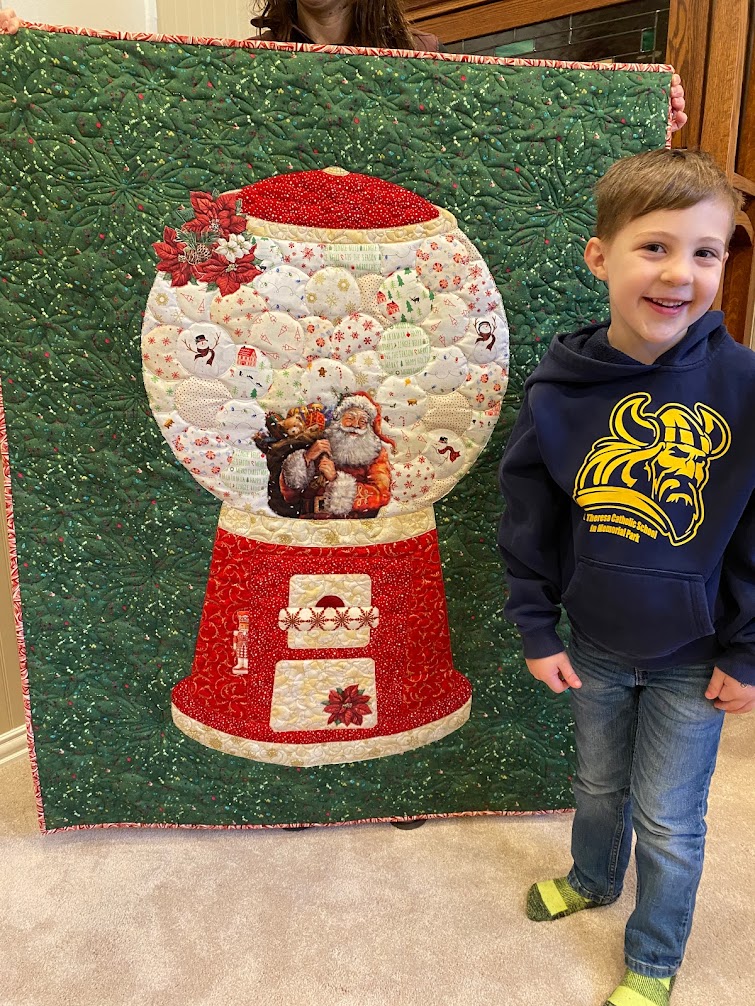
Of course, the third gumball machine quilt is a shout-out to Santa Claus. I started with a Santa panel and after a little fusing and cutting placed him in the gumball section of the quilt. I used Christmas fabric that reads “white” for the rest of the gumballs. It was fun to experiment with different shades of red and white for the gumball machine base. I call this art quilt “I Spy Ho-Ho” in honor of Mimi, my special needs daughter, who passed away in 2018. She adored Santa. Due to her limited speech, she called him “Ho-Ho.”

If you are needing to source collage supplies/fabric such as Karen Kay Buckley scissors, pattern ease, Steam-A-Seam 2 Lite, applique pressing sheet, fabric glue, and pretty fabric consider purchasing from my go-to online store: My Favorite Quilt Store.

The adorable model with the completed quilts is my handsome grandson Ben! He’s five.

New collage quilters – fusing fabric in 5 easy steps

I think fusing the fabric was my main issue with starting my collage quilt. Isn’t that silly? I had purchased a collage pattern the year before at Quilt Festival and then it just sat on the shelf. Every now and then I would pull it out and read all the directions. Then shove it into the plastic sleeve and move on to another project. Why was I letting the very first step in the process stand in my way of creating my first collage quilt? I had fused fabric before, but not very often … and there are different fusing products on the market. Also, I wasn’t familiar with the recommended Lite Steam-A-Seam 2 fusible.

Supplies needed for fusing include: Lite Steam-A-Seam 2 fusible, lots of fabric, Applique Pressing Sheet (my sheet is 13 inches by 17 inches), ironing surface and iron.

A few comments about Lite Steam-A-Seam 2. The fusible comes in a variety of widths and lengths and can be purchased online, in quilt and hobby shops. If purchased from a quilt/hobby shop you will find it on a bolt. I don’t recall the width but four or five yards is a nice amount for a large collage quilt. Since I intend to make lots of collage quilts, I purchased a 40-yard box. The fusible is 12-inches wide and comes in a large roll. This product has paper on both sides which works great for collage quilts. So lets start!

1. Cut your fabric and fusible in manageable lengths – The fusible is very sticky (when one side of the paper is removed) and can be difficult to handle (all that stickiness can fold up on you in a heartbeat) if you work with too large piece a piece. The Quilter’s Cut ‘n Press surface I use to iron and fuse my fabric on has a 12-inch by 18-inch surface. It is the perfect size for pressing collage fabric. But also great for fusing the sticky fusible to my fabric. Just know you can also cut your fabric in lots of small chunks and place on the fusible!

2. Iron all the fabric pieces you are wanting to use in your collage quilt – After cutting your fabric in manageable lengths, iron a stack that you will be fusing and set aside. You can save lots of time by using the efficient assembly-line method.

3. Cut lengths of fusible in manageable lengths – Cut the number of your lengths of fusible to match your fabric lengths and set aside. You will notice the Lite Steam-A-Seam 2 has paper on both sides. Don’t take your fusible apart yet!

4. Getting ready to fuse – Lay one sheet of fusible on your ironing surface. Peel off the top paper layer and discard this paper sheet. What you have left on your ironing surface is the sticky side of your fusible laying up … and the remaining paper layer down … against the ironing surface. Carefully lay one piece of your ironed fabric (right side up) on the sticky side of the fusible smoothing the fabric nice and flat.

5. Fusing your fabric – Take your Applique Pressing Sheet and cover the fabric/fusible. Slide your hot iron (cotton setting) quickly over the entire fabric/fusible. That is all it takes! The pressing sheet ensures the fusible will not get on your hot iron. Should a little fusible adhere to your pressing sheet it is easy to peel off and discard.

If you are interested in purchasing a Moo-Shu pattern (full-size) with supply list and detailed instructions, head over to my Etsy shop! Stay tuned for future Collage Quilt hints and tips and new patterns! I am working on a Christmas version of Moo-Shu and another Christmas collage pattern … to be announced!

And isn’t my grandson, Jacob, adorable? It cost me a quarter to get him to model for his photo! Totally worth it!